Importing and exporting
virtual machines in hyper-v is a way to move virtual machines to other servers.
When you export a VM, You need to specify a path. The
system will create a copy of all the files of the virtual machine to this path, including
configuration files, virtual hard disk and checkpoint.
Ceckpoint also call snapshot. You can export a
Virtual Machine while it is running or stopped.
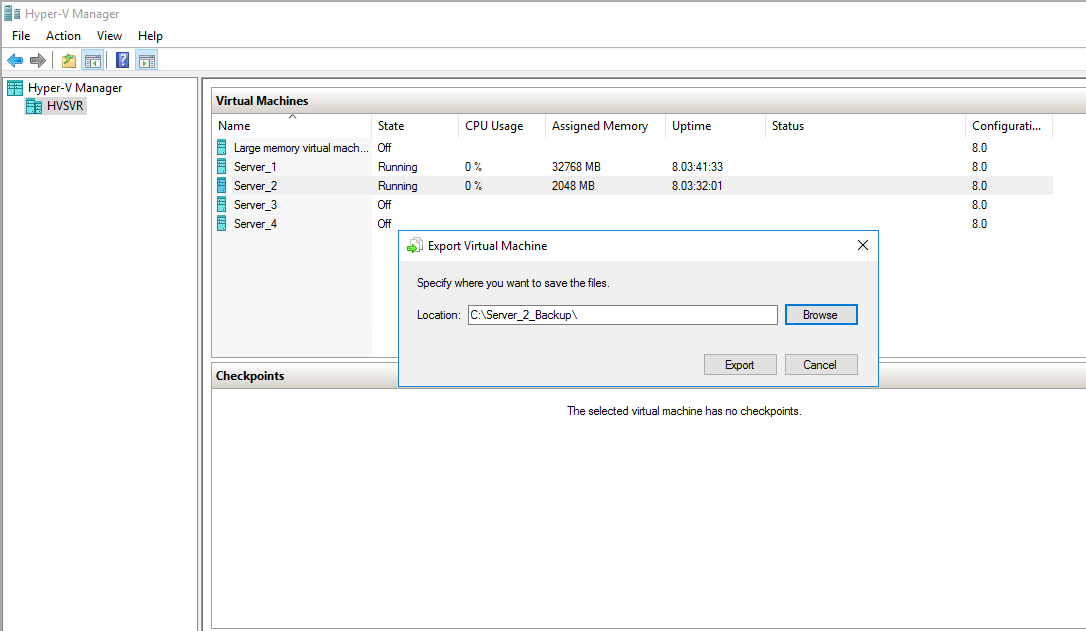
Export Virtual Machine
using Hyper-v Manager
Open Hyper-v Manager,
Right-Click the Virtual Machine you want to export, and select Export.

Specify a location store Virtual Machine files and
click Export
You can see the Virtual
Machine Export progress in the status bar

When
exporting a virtual machine, you can select Cancel Exporting in the Action pane cancel the export

You can also export
Virtual Machine using Export-VM cmdlet in Windows PowerShell
Name: VM's Name
Path: Path
of VM export

Open Hyper-v Manager, Select Import Virtual Machine in Action pane.

Click Next

Browse to the folder
containing the exported files.

Click Next

Chose you want to
import VM's type:
- Register The Virtual Machine In Place: Store the exported file where you want and register the virtual machine on the Hyper-V server with the same virtual machine ID.
- Restore The Virtual Machine: Assuming your exported files that are stored in a removable storage, you can choose this option to move the files to the right place,then register the virtual machine on the Hyper-V server with the same virtual machine ID.
- Copy The Virtual Machine: If you want to import this virtual machine many times, for example, you want to use this virtual machine as a template, you can choose this option. Copy the virtual machine to the right place, and generate a new ID, then register this virtual machine.
I select Copy The
Virtual Machine in here. Then click Next.

Specify the store
location of the configuration file, checkpoint file, and smart page file of the
virtual machine. Then click Next

Specify the store
location of the Virtual Hard Disk

Click Finish

When Exported Virtual machine is saved state,you need to delete the saved state to run the virtual machine.
Right-Click
the Virtual Machine,Select
Delete Saved State.


Click Delete

When the names of the
virtual switches on two Hyper-V hosts do not match, you will get an error like
a following.
Solution:Select the available virtual switch in the
connection option

You
can also import Virtual Machine
using Import-VM cmdlet in
Windows PowerShell
Copy: Copying the Virtual Machine's files to the default virtual machine and virtual hard drive storage
locations of the Hyper-V host.
GenerateNewId: Generate a new Virtual Machine ID

Note: When importing a virtual machine, you need to enter the full path of the virtual machine's configuration file.
If you want to import
the Virtual Machine from it's configuration file, and the Virtual Machine is
registered in-place. You can use following command:
Import-VM -Path 'the
full path to the virtual machine's configuration file' -Register
To specify different
locations for the copied files, you can add the following parameters to the
command line:
- VirtualMachinePath
- VhdDestinationPath
- SnapshotFilePath
- SmartPagingFilePath
没有评论:
发表评论